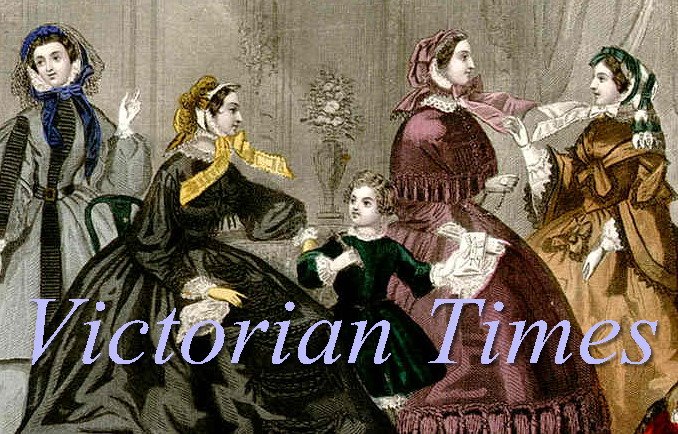
Showing posts with label victorian. Show all posts

Thursday, April 9, 2009

A Look Back In Time

It is a lot of fun dressing up my little boys in their Civil War reenactment clothing. It is even more fun watching them play with all the civil war period (reproduction) items laying around. It really sets the mood when we are civil war camping. My oldest boy gets a lot of photos taken of him when we our out on the field. When we are not too busy we get a couple of shots of him as well. These are two of my favorite photos of him. The photo on the left I call "Collecting Water" and the photo on the Right I call "A Look Back In Time"


The outfits my son is wearing I made for him. The shirt on the left was copied from an original in my collection. The outfit he has on in the right picture is a miniature outfit that matches his dad's. That's Dad's hat on of course!


Children wore dresses or long gowns during the civil war until they were potty trained. And it was not unusual to see a four year old boy or even older in a gown! Boy, haven't times changed. Both of my baby boys looked more like boys in their clothing rather than babies when they were newborn! Their outfits where complete with baby baseball caps, and even soft sold tennis shoes. Yet when we start pulling out our reenactment gear my three year old waits in eager expectation for his turn to play dress up!


Wednesday, September 17, 2008

Warm and Cosy

Here is my new dress. This dress is made out of soft and warm cotton flannel. It gets cold at some of the fall and winter reenactment events. When I bought the fabric for this dress I had the Dickens Christmas Fairs in mind. October is my big month for making Dickens dresses. The style of the dresses are the same as my civil war dresses only the colors are different. Most ladies I sew for ask for gem colored fabric (ruby, sapphire, and emerald) or dark Christmas colors (wine red and hunter green).

This dress is more of a ruby and sapphire colored dress. I have it listed in my store Victorian Times and I can't wait to see who buys it. This time of year it could be a civil war reenactor, a Dickens Fair reenactor, or even a Halloween shopper. Who ever buys it will stay nice and warm!

Here is a picture of the whole dress. It still needs to be hemmed. But I will hem it to the new owners measurements. Some people wear five and six bone hoops while I only have the dress on a four bone hoop. The bigger the hoop the longer the dress needs to be.

In the next few days I plan to feature some more Etsy sellers and some more wonderful Victorian items they sell.

Monday, August 11, 2008

Victorian Items on Etsy


This week I plan to feature several people who sell Victorian Items on Etsy. If you like handmade or vintage items, Etsy is a great place to look for them.


Today I want to feature an item for sale by Lilly Queen. Lilly Queen has been selling on Etsy for three years come August 13th. You can find a wonderful assortment of jewelry in Lilly Queen's store. One of my favorite items for sale is the ring pictured. Lilly Queen calls the ring Victorian Marcasite and Mother of Pearl Ring. Rings were very popular during the civil war. This ring would be great for a living history impression or for a reenactor. It is very lovely.


Lilly Queen offers Internet parties that anyone can host. You can contact Lilly Queen for more information by going to Lilly Queen's Etsy store. You can also check out Lilly Queen on her blog Lilly Queen Jewelry.

Monday, July 28, 2008

1861 Victorian Civil War Wrapper


The dress pictured is from my 1861 Godey's book and features a dress known as a wrapper. I love the trim work on this dress. Notice how the dress buttons all the way down the front? By buttoning down the front it made it easier for women to put it on. They could wrap the dress around themselves hence the name wrapper.

Many women wore wrappers in the early morning hours before visitors would come by. Much like we may wear a robe today. Wrappers were also very common among pregnant women and nursing mamas.

The dress in the picture is nicer than a basic wrapper and could be worn as a visiting or calling dress.

Tuesday, July 22, 2008

My Victorian Children

Living History Reenacting with children can be quite an adventure! My first son started reenacting with my husband and me when he was five months old, and my second son started when he was three months old. There are a lot of challenges to reenacting with children especially when camping over night! However it can be a lot of fun as well. Both of my boys love to dress up. And we are constantly being asked by photographers and spectators if they can take the boys pictures. But how can you resist!

Here is my two year old. He's an old pro at reenacting!
He even knows how not to smile at the camera!


I love to take my two year old's picture when he doesn't know I'm taking pictures.


The Shirt my son is wearing was drafted after an original boys shirt that I have in my collection!


Here's me and my three month old! Yes ALL Babies wore dresses!
Technically my two year old should still be in a dress but it does not go over very well even in the reenactment circle.


And here is my precious little boy!

White Garden Lily - Knitted Artificial Flowers

Here are knitting instructions form Godey's Lady's Book and Magazine March 1861. You are welcome to use these instructions however way you like. I have not made this myself, so if anyone makes it, feel free to live a comment about the difficultly of the instructions.

Six petals, six stamens, one pistil, are required to form each flower; two knitting-needles, NO. 19, and a skein of superfine white Shetland wool.

Cast on four stitches.
1st row. - Slip one, purl two, knit one
2d. - Make one, purl one, knit two, purl one.
3d. - Make one, knit one, purl two, knit two.
4th. - Make one, purl two, knit two, purl two.
5th - Make one, knit two, purl two, knit two, purl one.
6th - Make one, knit one, purl two, knit two, purl two, knit one.
7th - make one, purl one, knit two, and purl two alternately to the end of the row.
8th.- make one, knit two, purl two alternately to the end of the row.
9th.- Make one, purl two, knit two to end of row; knit last stitch plain.
10th- Make one, purl two, knit two to end of row; purl the last stitch.
11th - make one, knit one, knit and purl two alternately to the end of row.

You will now have fourteen inches, making seven ribs: continue these seven ribs until you have knitted a length of three inches from the beginning of the work. Break off the wool leaving a bit long enough to thread a rug needle with; with this needle take up seven stitches, which you must fasten off; then the other seven, and fasten in the same way, which completes one petal. Take a piece of fine wire sufficiently long to leave a small bit at the end for a stalk, and sew it neatly round the edge of the petal with white wood, which will make it in form.

Pistil. - cut a length of wire of about eight inches, fold a bit of green Berlin wool in six and split in two another bit of the same wool; place this lengthwise with the other wool, and place the wire across the wool, fold the wire down, and twist it as tightly as possible, thus in closing the wool; turn down the shortest end of the split wool, and twist the longest round it and the wire, so as to cover them evenly; fasten the wool with a slip-knot at the end of the stem. Cut off a part of the green wool at the top, so as to leave merely a neat little tuft of wool at the end of the wire.

Stamens are made in the same way as the pistil, merely using yellow Berlin wool instead of green, and covering the stem with white instead of green. Place one stamen with every petal, twisting the wires of both together. the pistil is to be placed in the centre of the flowers when made up. Sew the petals together, leaving them open about an inch at the top, as neatly as possible, and draw them close at the bottom, twisting the stems together.

Buds.- several buds are required; the large ones are of a very pale shade of green, the smaller ones of rather deeper color. they look best in double knitting, and should be done in different sizes from twelve to twenty stitches. Knit about an inch of these different widths, and open them like a little bag. Take a piece of coarse wire, double some common wool about the thickness of your finger, put it across the wire, which must be folded down and twisted very tight; put this wool into the little bag, and gather the stitches of the bud at the top, catching the wire with your needle to fasten it. this will form the shape of the bud; fasten the stitches also at the bottom, and cover the stem with green wool split in two.

Leaves- Different shades and sizes are required. Begin them all at the top, casting on four stitches; they look best in double knitting, without putting the wool twice round the needle; increase one stitch every second or third row, till you have eight stitches for the smallest, and sixteen for the largest size. Continue to knit without increase, till the leaf is the required length. The longest should be about a finger length, the smaller in proportion. the longest must be placed at the bottom of the stem when making up.

To finish a leaf, pull your needle out, and thread a rug needle with the wool, and pass it through the stitches so as to form a little bag, into which you must insert a bit of double wire; catch this at the top or sides to fix it, and it will keep the leaf in shape. Draw the wool tight on the while the stitches are threaded, and twist the wool at bottom round the little stem.

The next operation consists in mounting the branch. Begin at the top with the smallest bud, round the stem of which some green wire must be twisted. fix it at the top of a piece of bonnet wire, the length required for the long stem; continue to twist the wool round, and thus fasten the second bud, and the rest in the same way, at very small intervals. the flowers are fastened in a similar manner, according to taste, adding the leaves as needed.

Six buds, three flowers, and eight or ten leaves, form a beautiful branch.

Although the petals of the lily can be made up with the wool as it is, they look much better if, after being knitted, they are washed with a little blue in the water, and quickly dried, before the wire is put round them.

Monday, July 21, 2008

Christmas in July!


I make a lot of Dickens Christmas Dresses! In November and December a lot of people attend Christmas Dickens Fairs. At those fairs Ladies dress up in gem colored or Christmas colored hoop dresses, and men sport top hats, white gloves, and look very handsome in their Victorian suits. For onlookers, Dickens Fairs look like The Christmas Carol has come to life. Tiny Tim or even Scrooge himself might be around the corner!

This year I am taking Dickens Dress orders beginning July! I enjoy working with ladies as they share their idea of the perfect dress and then watch the dress take shape on my dress form. Some ladies like their dresses to be simple yet elegant. While other ladies like their dress to be very eye catching. The picture is one of the dresses I made last year as a custom order.

I am offering custom made dresses in my Etsy story. If you mention this blog I will discount the custom order 10%. Just type in Victorian Blog in the message to seller and I will refund you the 10% or send you a new invoice.


Sunday, July 20, 2008

Civil War Fashion - Right or Left?


The Civil War was a time of turmoil and distress in our nation, but it was also a time of beauty and elegance in women's clothing. While studying original garments, pictures, and fashion magazines of the era, I have come to find out some very interesting information on the construction of these beautiful dresses.
In our day and time women shirt's are buttoned right over left and men's left over right. Did you ever wonder how that got started? One day while finishing up a custom order dress I noticed that I had sewn the dress to button left over right. At first I was greatly troubled and thought I would have to start all over on the order. Then I decided to do a some research on the issue. I pulled out my CdV's (civil war photos), and my Godey's Lady Book to see if there was a right way to close the front of the dress during the civil war. Half of the CdV's in my collection were buttoned right over left, while the other was buttoned left over right.
I posted my discovery on on one of the civil war message boards, and asked if anyone knew any information on button preference. One person said that it depends on whether the lady was right handed or left handed and which way would be easier for her to button and unbutton. Another person said that it depended on whether the lady had a maid servant, who dressed her. My favorite answer was the following. Though out history men and women had a distinction in their clothing. There is a verse in the Bible that states a woman is not to dress like a man. During the civil war and after women's shirts started to become popular. To make a difference between men's shirts and women's the right over left and the left over right started to become the norm. So no in our time men wear their shirts left over right and women wear their shirts right over left.
I still don't know which answer is correct, but I do know there was not a preference during the civil war era. So if you want to add a little to you civil war impression think about having your next dress made to button left over right. And when someone tells you that your dress is buttoned wrong, you have a little piece of history to impart to them.
The dress pictured is one of my creations! You can see more of my dresses on Etsy